
Guarding Vision App for iOS - Download on Your iPhone & iPad
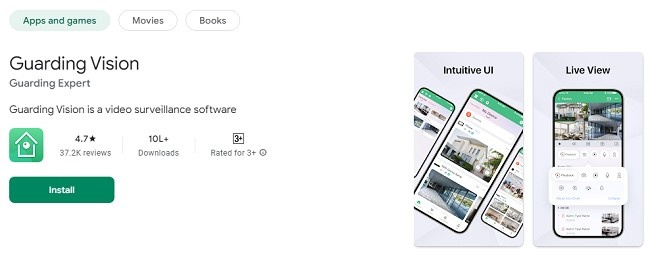
In today's fast-paced world, security is a priority for many individuals and businesses alike. Whether you're monitoring your home, office, or any other location, keeping an eye on things remotely has become easier thanks to surveillance systems integrated with mobile applications. One such app is Guarding Vision, which enables you to manage your CCTV cameras, DVRs, NVRs, and IP cameras from anywhere in the world, directly from your iOS device.
If you are new to Guarding Vision or just need help with installation, this guide will walk you through every step of the process, ensuring you set it up correctly and maximize its features.
What is Guarding Vision?
Guarding Vision is a mobile application designed to work seamlessly with your surveillance devices such as DVRs (Digital Video Recorders), NVRs (Network Video Recorders), and IP cameras that support Cloud P2P (Peer-to-Peer) functions. The app allows users to remotely access their cameras, monitor live footage, playback recorded video, and receive notifications triggered by motion detection—all from the comfort of your iPhone or iPad.
The main advantages of using Guarding Vision include:
Real-Time Monitoring: View your cameras live from anywhere in the world.
Video Playback: Access and review past footage to revisit significant events.
Motion Detection Alerts: Get notified instantly when movement is detected by your surveillance system.
Cloud Connectivity: Enables seamless integration with your security system over the cloud, eliminating the need for complex network configurations.
In this guide, we'll focus on how to install and set up Guarding Vision on an iOS device.
System Requirements for Guarding Vision on iOS
Before you begin the installation process, ensure your iOS device meets the following requirements:
Operating System: iOS 9.0 or later.
Compatible Devices: iPhone, iPad, or iPod Touch.
Network Connection: A stable internet connection (Wi-Fi or cellular) is required for live viewing and remote access.
Supported Devices: DVR, NVR, or IP cameras that are compatible with Guarding Vision and support Cloud P2P functionality.
Once you've confirmed that your device meets these requirements, you're ready to install Guarding Vision.
How to Get Guarding Vision App on Your iOS Device?
Step 1: Download the Guarding Vision App
The first step in using Guarding Vision is to download the app from the Apple App Store.
Open the App Store: Unlock your iPhone or iPad and tap the App Store icon.
Search for Guarding Vision: In the search bar at the bottom, type in "Guarding Vision" and press enter.
Download the App: The app should appear as the top result. Tap the Get button, followed by Install. If prompted, enter your Apple ID password or use Face ID/Touch ID to confirm.
Wait for Installation: The app will download and install on your device. Once the installation is complete, tap Open to launch Guarding Vision.
Step 2: Open the App and Create an Account
Once the app is installed on your iOS device, you will need to create an account to access its features.
Launch Guarding Vision: Tap on the Guarding Vision app icon on your home screen to open it.
Create an Account: If this is your first time using the app, you'll need to create a new account.
Tap Sign Up.
Enter your email address and create a password.
You may also be asked to enter other details like your name and phone number.
Verify Your Email: After signing up, you will receive a verification email. Open the email and follow the instructions to confirm your account.
Log In: Once your account is verified, return to the app and log in using your newly created credentials.
Step 3: Add Your Device to the App
To start using Guarding Vision, you must link your security device (such as an IP camera, DVR, or NVR) to your account.
Tap the "+" Button: After logging in, you'll be directed to the main screen of the app. Look for a "+" or Add Device button, typically found in the upper-right corner.
Select Device Type: Choose the type of device you want to add (e.g., DVR, NVR, IP camera).
Enter Device Information: You will need to enter specific information about your device, including:
Device ID/Serial Number: This can be found on the device or in the user manual.
Device Password: If your device requires a password for access, enter it here.
Confirm Connection: Once the details are entered, tap Confirm or Add Device to sync the device with your app.
Step 4: Configure Your Device for Remote Viewing
To ensure smooth and uninterrupted viewing, you need to properly configure your surveillance system.
Check the Device Network Settings: Your device must be connected to the internet. If using a Wi-Fi-enabled camera, ensure it is connected to your Wi-Fi network.
Enable Cloud P2P (Peer-to-Peer): Most devices that work with Guarding Vision use Cloud P2P functionality for remote access. Check the device settings or the manual to ensure that this feature is activated.
Test the Connection: After configuration, return to the Guarding Vision app and test the live video feed to ensure that everything is working as expected.
Step 5: Set Up Motion Detection and Notifications
One of the most useful features of Guarding Vision is the ability to receive instant notifications whenever motion is detected.
Enable Motion Detection: Within your device’s settings in the app, locate the Motion Detection settings. Toggle the switch to enable it.
Adjust Sensitivity: Set the sensitivity of the motion detection to your preference. Higher sensitivity will alert you to even minor movements, while lower sensitivity will reduce false alarms.
Set Up Push Notifications: In the app's notification settings, enable Push Notifications. This will ensure you receive real-time alerts when motion is detected by your device.
Test Notifications: Trigger a motion event by walking in front of your camera. Check your phone to verify that you receive a notification.
Troubleshooting Common Installation Issues
While the process of installing Guarding Vision is simple, you may encounter some issues along the way. Here are a few common problems and how to solve them:
Problem 1: Cannot Connect to Device
Solution: Ensure that your device is powered on and connected to the internet. Check your device's network settings and ensure that Cloud P2P is enabled.
Problem 2: No Notifications
Solution: Verify that push notifications are enabled in both the app and your iOS settings. Also, ensure motion detection is activated on your device.
Problem 3: Live Video Feed is Not Working
Solution: Check your internet connection. If you're using Wi-Fi, make sure your signal is strong. You may also want to restart the app or your device.
Using Guarding Vision for Real-Time Monitoring and Playback
Once installed, Guarding Vision allows you to easily view live footage, access recorded video, and monitor your cameras remotely.
Live Viewing: Tap on your device within the app to view real-time video footage.
Playback: Access past footage by navigating to the Playback section and selecting a date and time.
Motion Detection Notifications: View and acknowledge notifications sent by the app when motion is detected.
Security Tips for Using Guarding Vision
To ensure the security of your surveillance system and data, follow these best practices:
Use Strong Passwords: Ensure your Guarding Vision account and devices are secured with strong, unique passwords.
Enable Two-Factor Authentication: If available, enable two-factor authentication for added security.
Regularly Update the App and Devices: Keep the app and your surveillance devices updated to benefit from the latest security patches and features.
Conclusion
Installing Guarding Vision on your iOS device is a straightforward process that opens the door to convenient, remote monitoring of your cameras and security systems. By following the steps outlined in this guide, you can ensure that your installation is seamless and that you are fully equipped to monitor your property in real-time. With features like video playback, motion detection, and notifications, Guarding Vision provides a robust and user-friendly security solution for iOS users.
Updates